
AI Architecture Photography and Creative Figures: Great Wall Aerial Shot and ID Photo in Practice
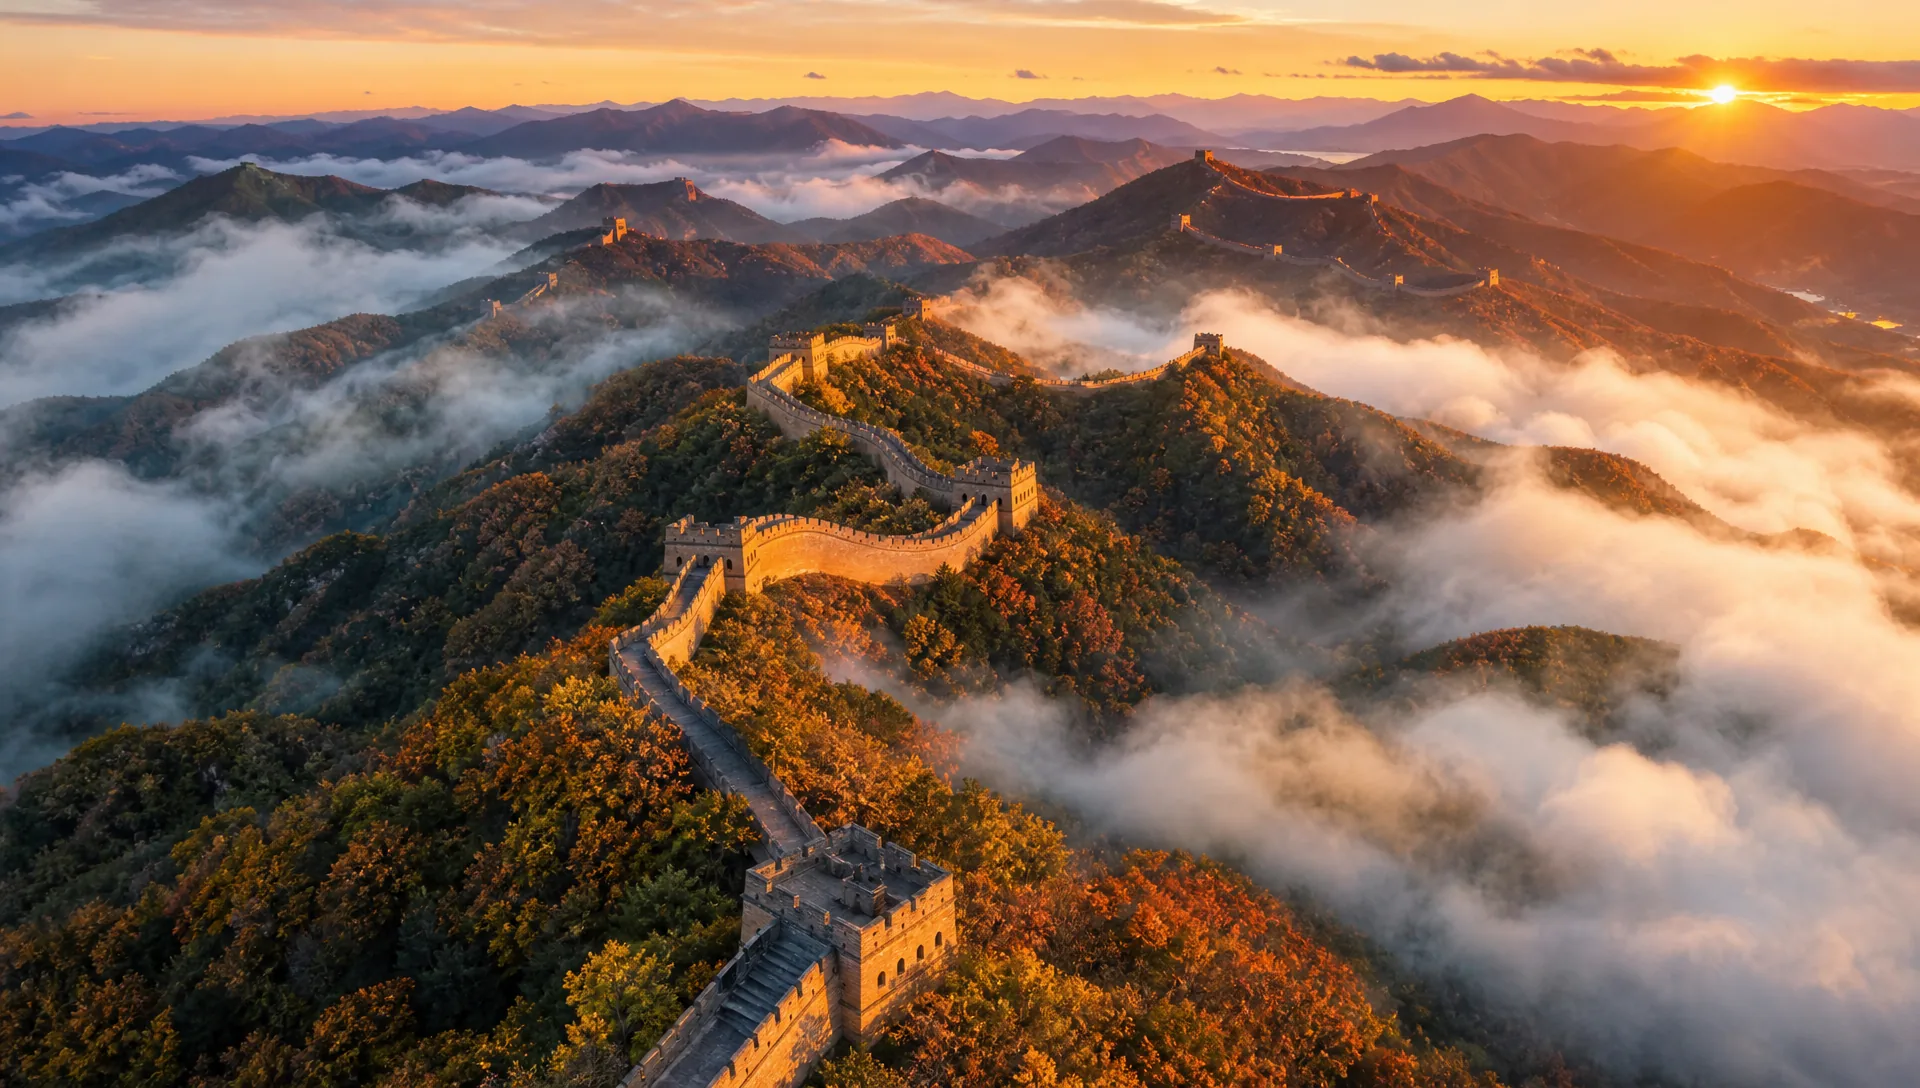
The keys to architecture photography are viewpoint and light: an aerial drone shot + a 16:9 landscape frame brings out a landmark’s grandeur best; the key to creative figures is swapping formula sections—the four-part structure “core subject + style + scene + texture” runs from a formal ID photo to a clay-figure look by replacing only the style section.
What You’ll Take Away from This Guide
Architecture Photography in Practice: Great Wall Sunset Aerial Shot
Architecture photography focuses on a building’s spatial structure, the rhythm of its lines, and the texture of its materials. Traditional architectural shooting demands wide-angle and telephoto lenses to match different spatial scales, precise control of the timing of natural light, and careful avoidance of cluttered surroundings—an extreme test of spatial perception and technical control. Puyo AI compresses all of that into a prompt—for landmark architecture, it captures a building’s grandeur with sweeping perspectives combined with light and shadow.
Step one: open the Puyo AI image generation page, click the “Model” button, set the image model to “Puyo AI Standard”, and enter the prompt in the input box:
Aerial drone shot of Badaling Great Wall at sunset. The Great Wall winds like a giant dragon across the Yanshan Mountains. The setting sun dyes the ramparts golden-red, and layered mountains are covered with autumn foliage. Beacon towers scatter in the distance. Captured by DJI Inspire 3 with Hasselblad lens, f/8, shutter speed 1/200s, ISO 100. Ultra-high definition, high-altitude top-down view. Light and shadow trace the outline of the Great Wall, with soft sea of clouds wrapping around mountain slopes. Rich, well-defined color layers. It highlights the grandeur of the Great Wall and the atmospheric glow of sunset.
How to: set the model to “Puyo AI Standard”, enter the prompt, set the ratio to 16:9, the resolution to 2K, and the number of images to 1, then click “Create”.
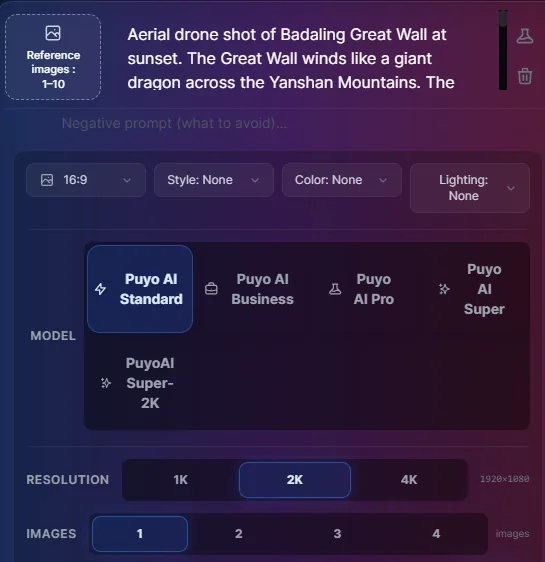
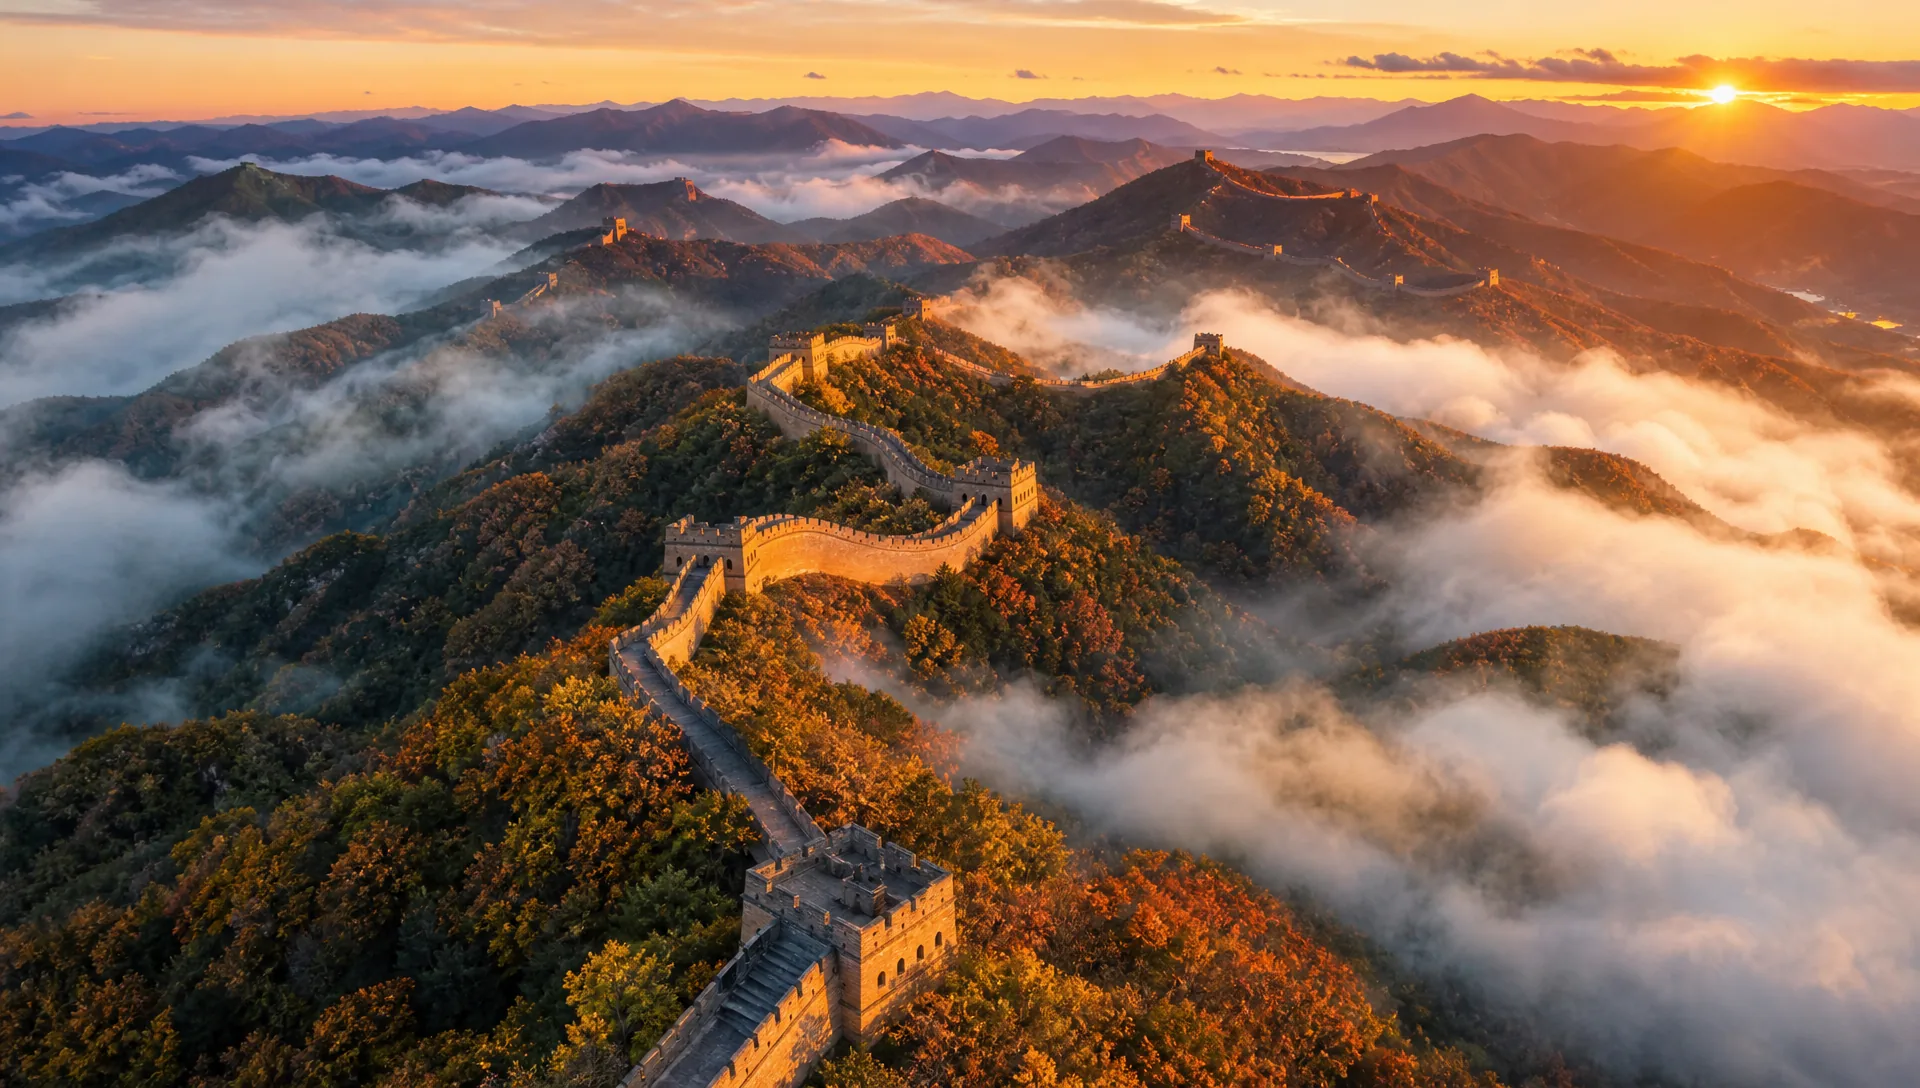
Fig. 1-8 Great Wall aerial shot: viewpoint, light, and environment—three layers of description, none skippable
Notice the three-layer structure of this prompt: the viewpoint layer (aerial drone shot + high-altitude top-down view), the light layer (sunset dyeing the walls golden-red + light and shadow tracing the outline), and the environment layer (scattered beacon towers + clouds wrapping the slopes). The building itself takes up just one sentence; the environment and atmosphere are the pivot that makes the image work.
Four Architecture Scenes: Gardens, Industry, Interiors, Creativity
Beyond landmarks there are four common kinds of architecture photography: garden architecture photography depicts classical garden scenery, blending nature into an elegant mood; industrial architecture photography captures industrial relics, highlighting rugged texture and a weathered atmosphere; interior architecture photography presents all kinds of interior layouts, conveying a distinctive style and a sense of comfort; and creative architecture photography reconstructs buildings from unique angles and approaches for a strong visual impact:
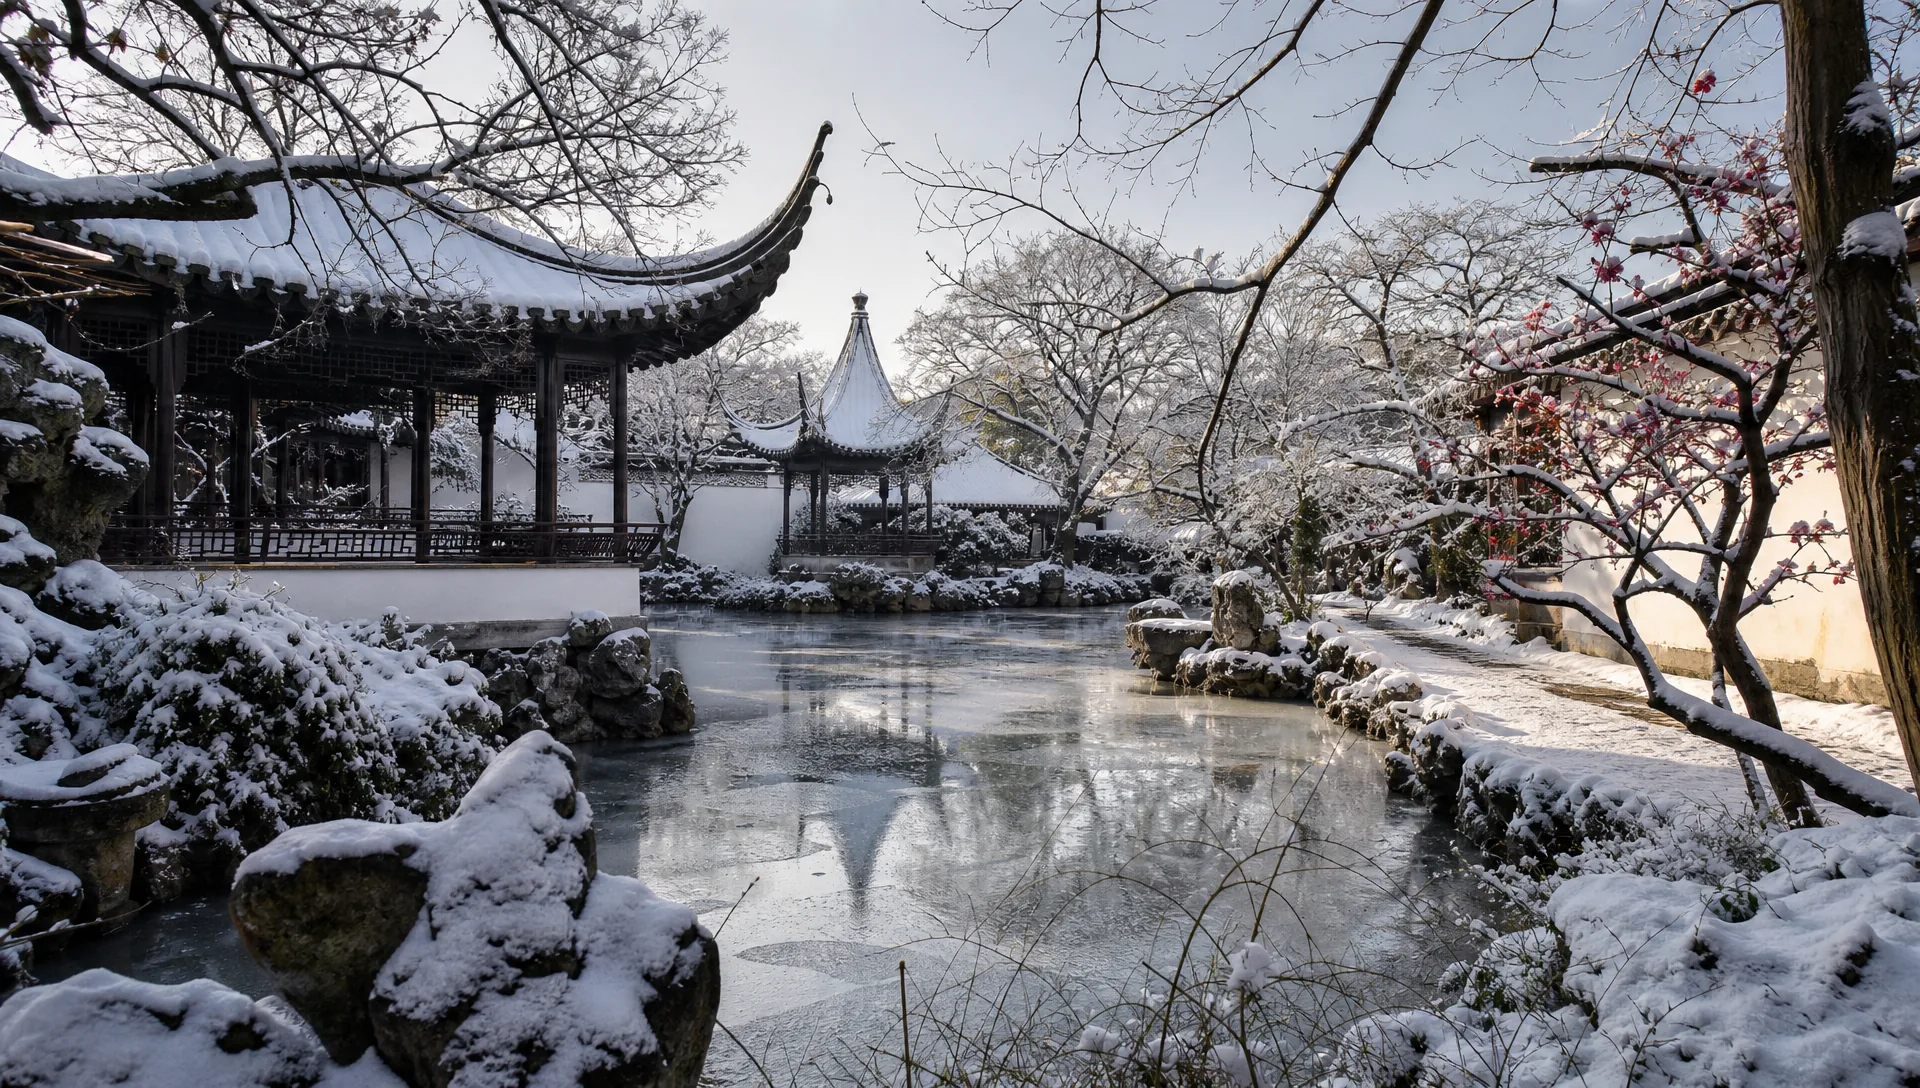
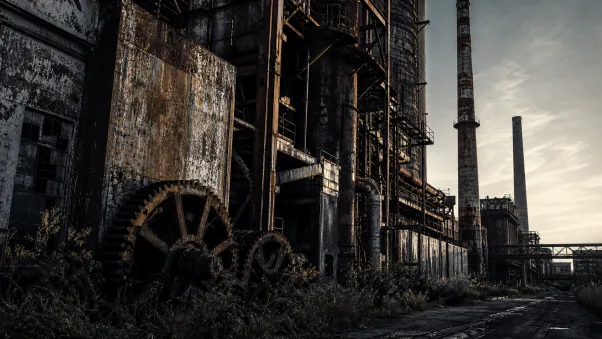
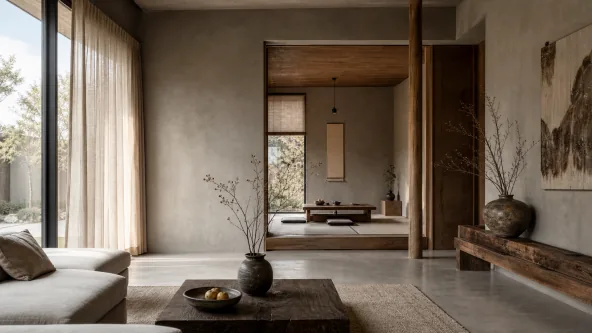
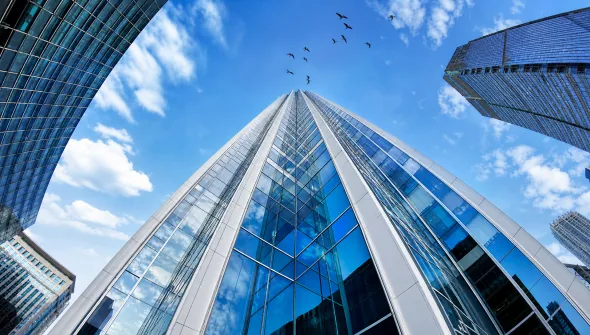
Fig. 1-9 Four kinds of architecture photography: different subjects, the same logic of light
With this guide, all four photography-simulation genres—landscape, food, portraits, and architecture—are complete. The next block turns from “reproducing reality” to “creating style”.
The Four-Part Visual Creation Formula
Visual creation is the block where Puyo AI unlocks trendy new looks: no complicated design barrier—prompts alone deliver expression in many styles. To land your ideas efficiently, keep four points in mind: precise style positioning—replace vague descriptions like “retro figure” with concrete keywords such as “1980s Hong Kong film-style portrait”; layered, structured prompts—arrange instructions by priority to avoid information tangles; concrete detail description—spell out garment styles, key props, and color palettes; and style fusion and transfer—experiment with cross-style combinations like “classic Hanfu + fashion-magazine composition”, or reverse-engineer prompts from existing works.
Beginners can apply this four-part formula directly—simple to remember and precisely controllable:
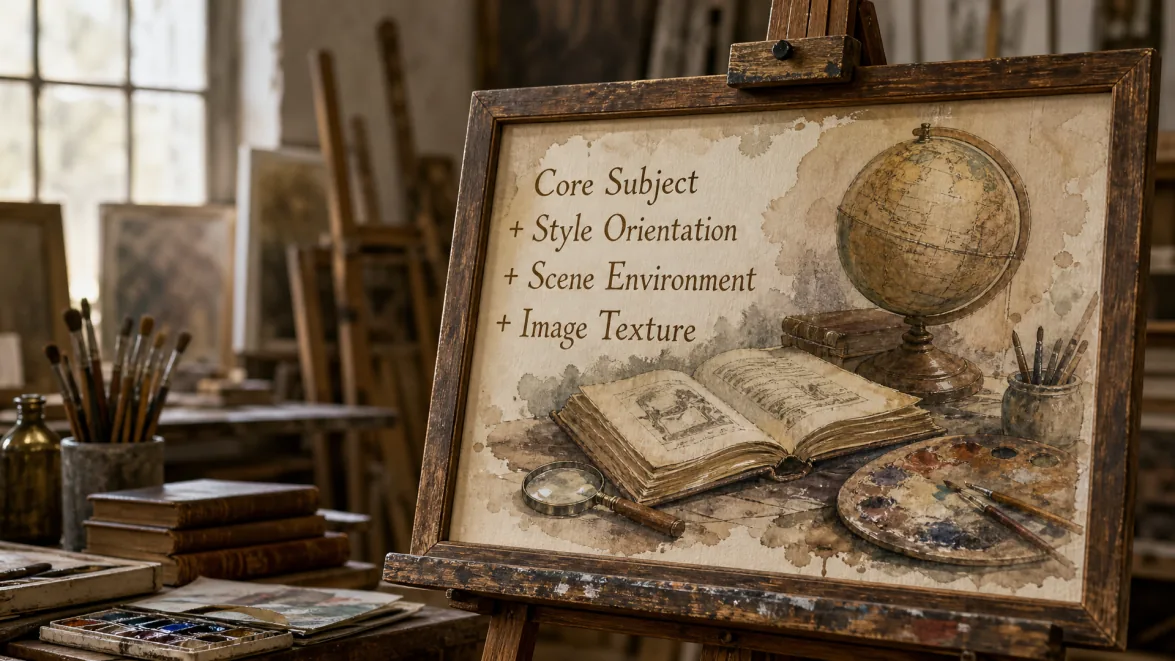
The “core subject” defines what to generate and its key features; the “style” sets the overall visual tone; the “scene” places the subject in its space or background; and the “texture” lifts the atmosphere and realism. Each part has its own job—lighter than photography simulation, with no loss of precision.
Playing with Figures: ID Photo in Practice and Four Styles
Figures are the most emotionally expressive canvas in visual creation. The first practical scenario is the ID photo—it cuts out the time spent at a photo studio. Step one: open the Puyo AI image generation page, click the “Model” button, set the image model to “Puyo AI Standard”, and enter the prompt in the input box:
Official ID photo, young East Asian male aged 20–25, neat short black hair, delicate facial features. He wears a black suit jacket, white formal shirt and navy blue tie. Standard solid red ID-photo background. Facing the camera straight at eye level, natural neutral expression with no exaggerated gestures. Even and soft lighting, no obvious shadows. High-definition image, standard ID photo composition, clean frame with no extra decorative elements.
How to: set the model to “Puyo AI Standard”, enter the prompt, set the ratio to 9:16, the resolution to 2K, and the number of images to 1, then click “Create”.
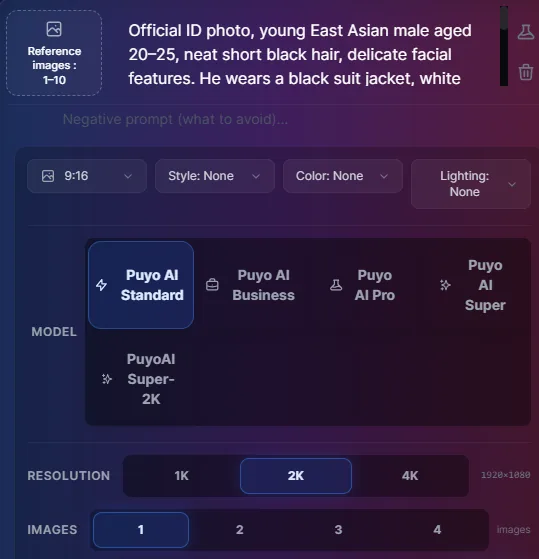
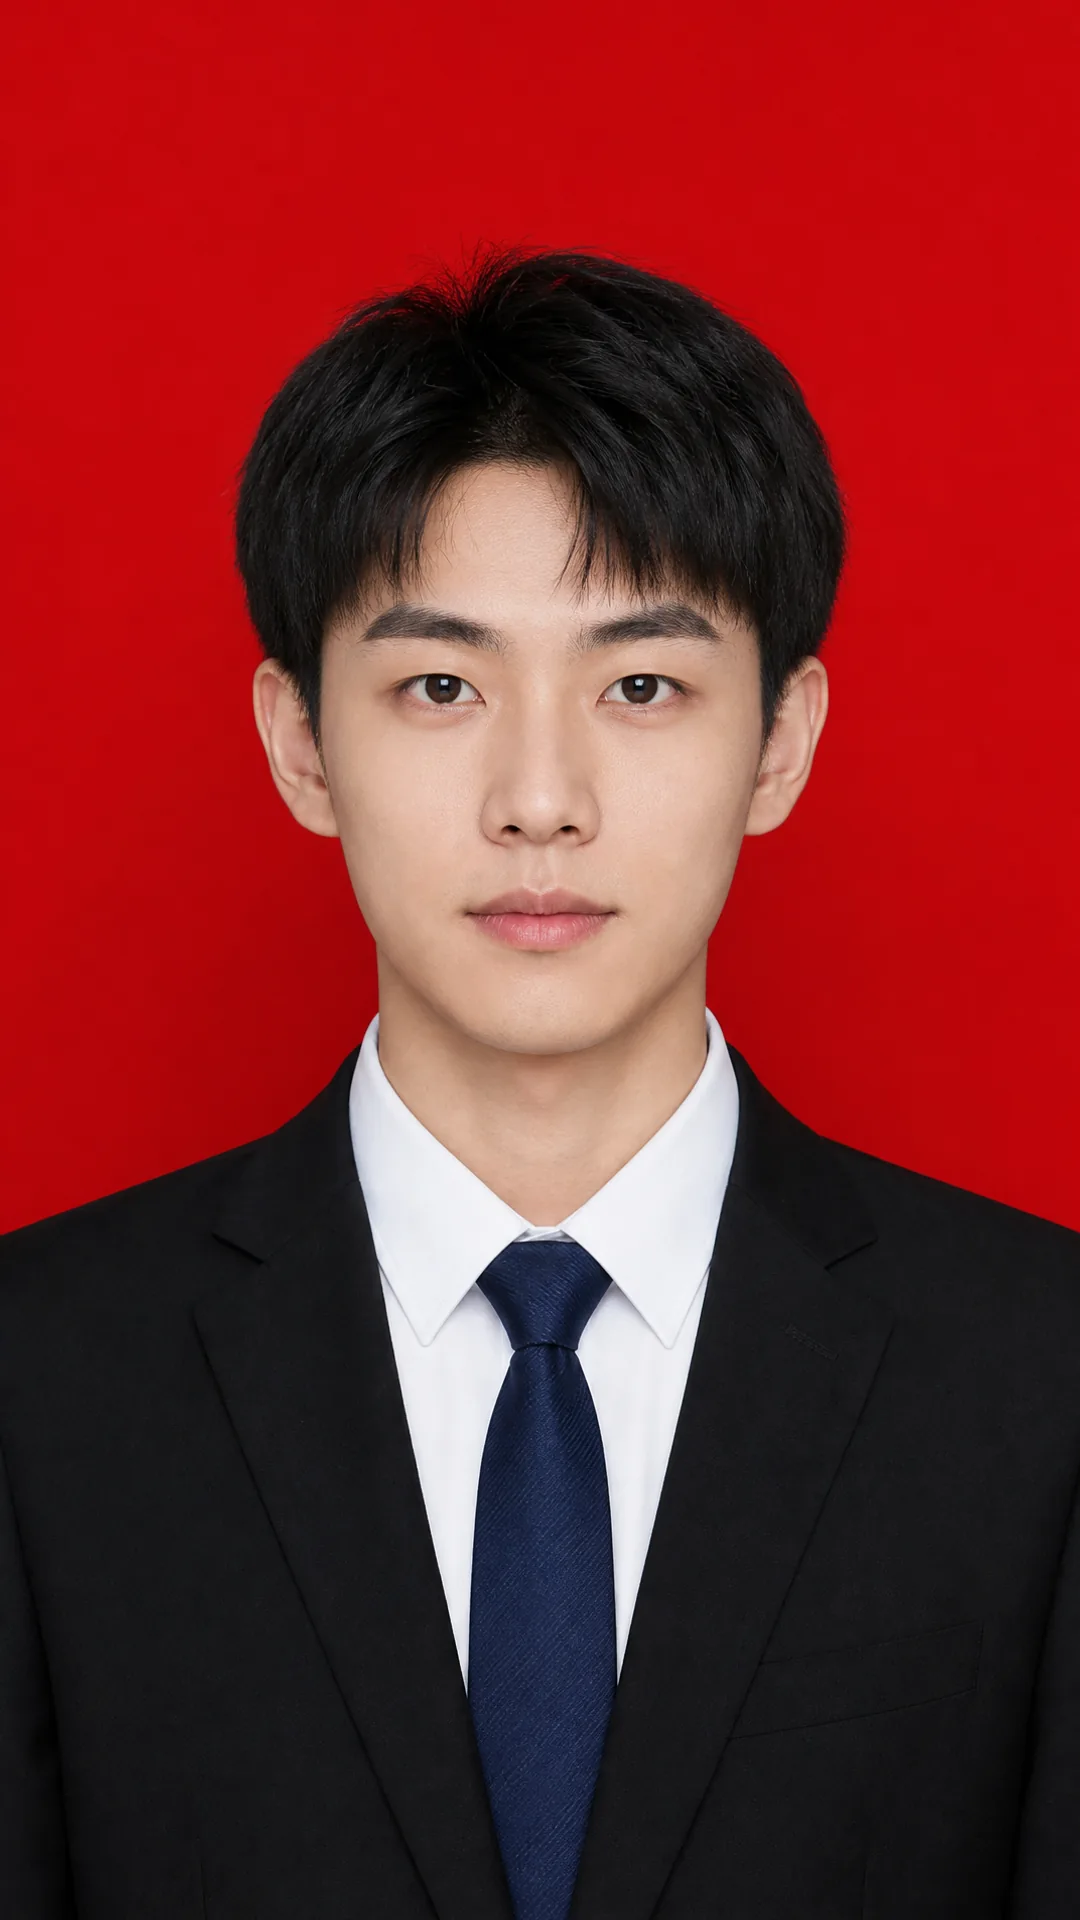
Fig. 1-11 ID photo: the three “standard words”—background, gaze, and lighting—decide usability
The ID photo prompt looks plain, but every phrase is a standard: a solid red standard background, facing the camera straight at eye level, even and soft lighting (no obvious shadows), and standard composition—drop any one of the four and the result may drift away from ID photo requirements.
Beyond formal portraits, figures come in four highly popular styles: chibi avatars use exaggerated proportions for cute, lively looks; sketches build a realistic, three-dimensional hand-drawn feel with monochrome lines and shading strokes; retro style recreates the aesthetics of a specific era, using faded colors and film grain for a nostalgic mood; and clay style mimics 3D handcrafted clay, its rounded shapes and matte texture delivering a soothing, adorable handmade feel:
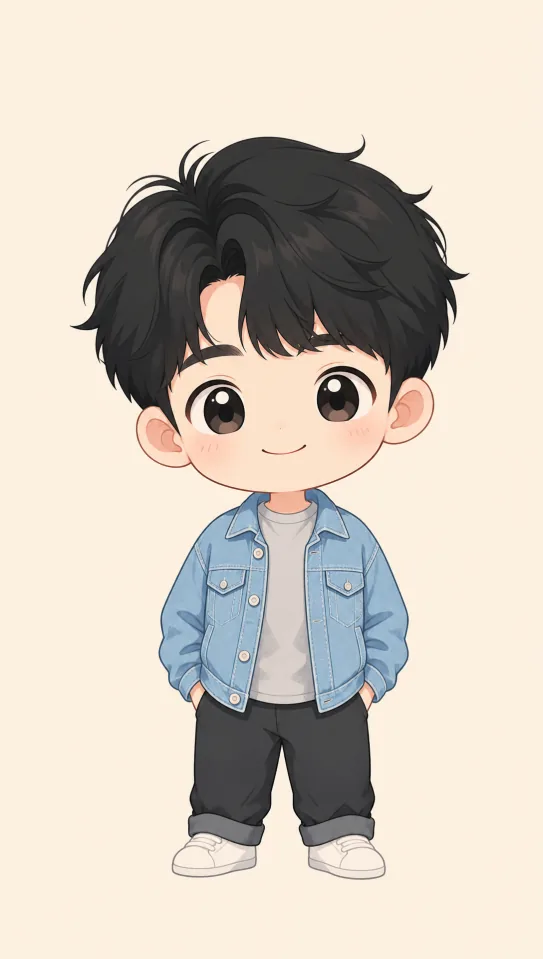
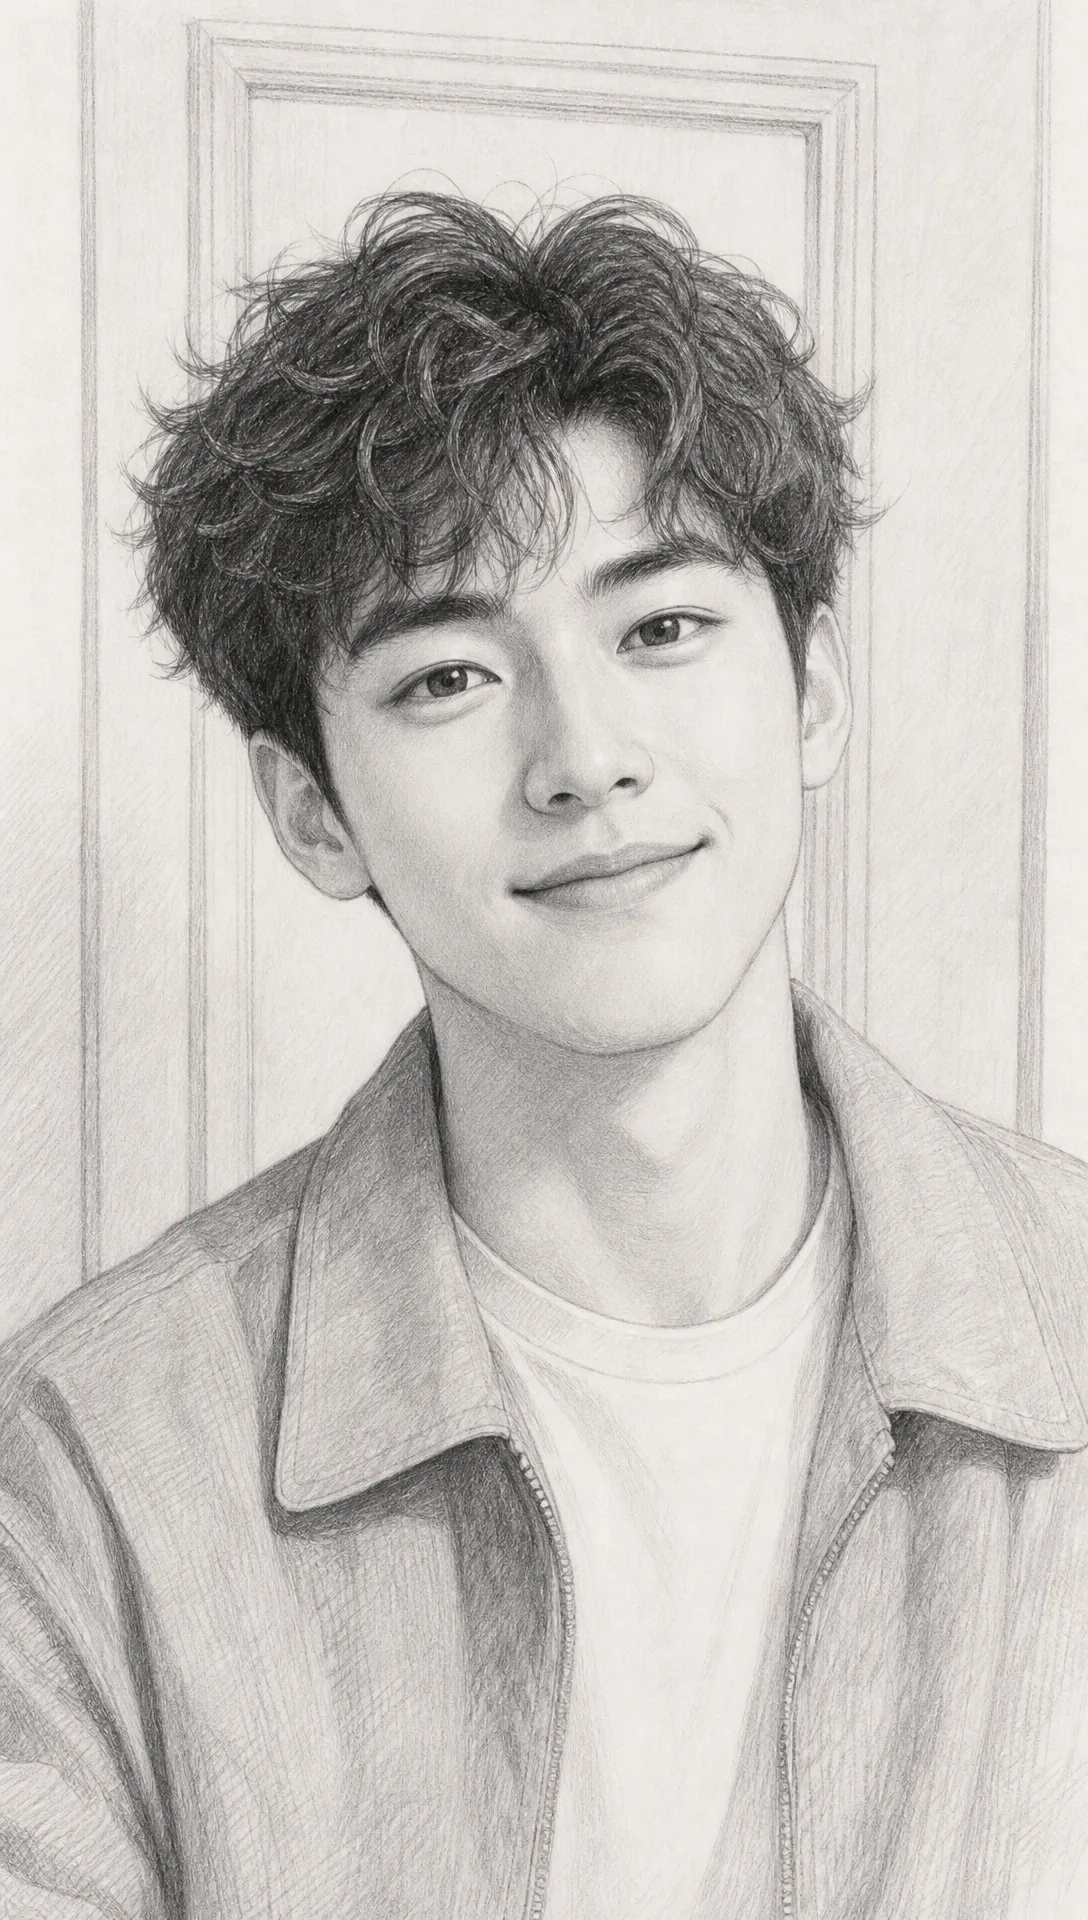
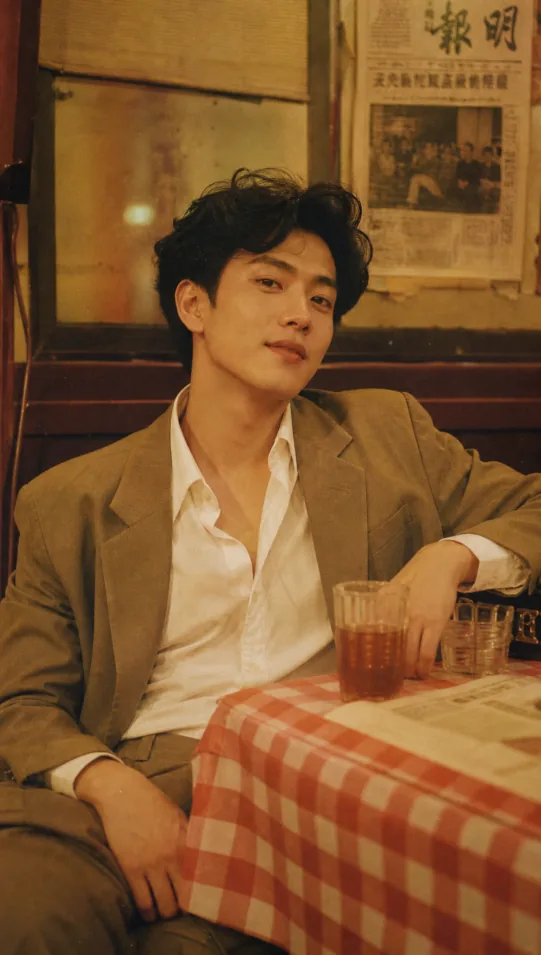
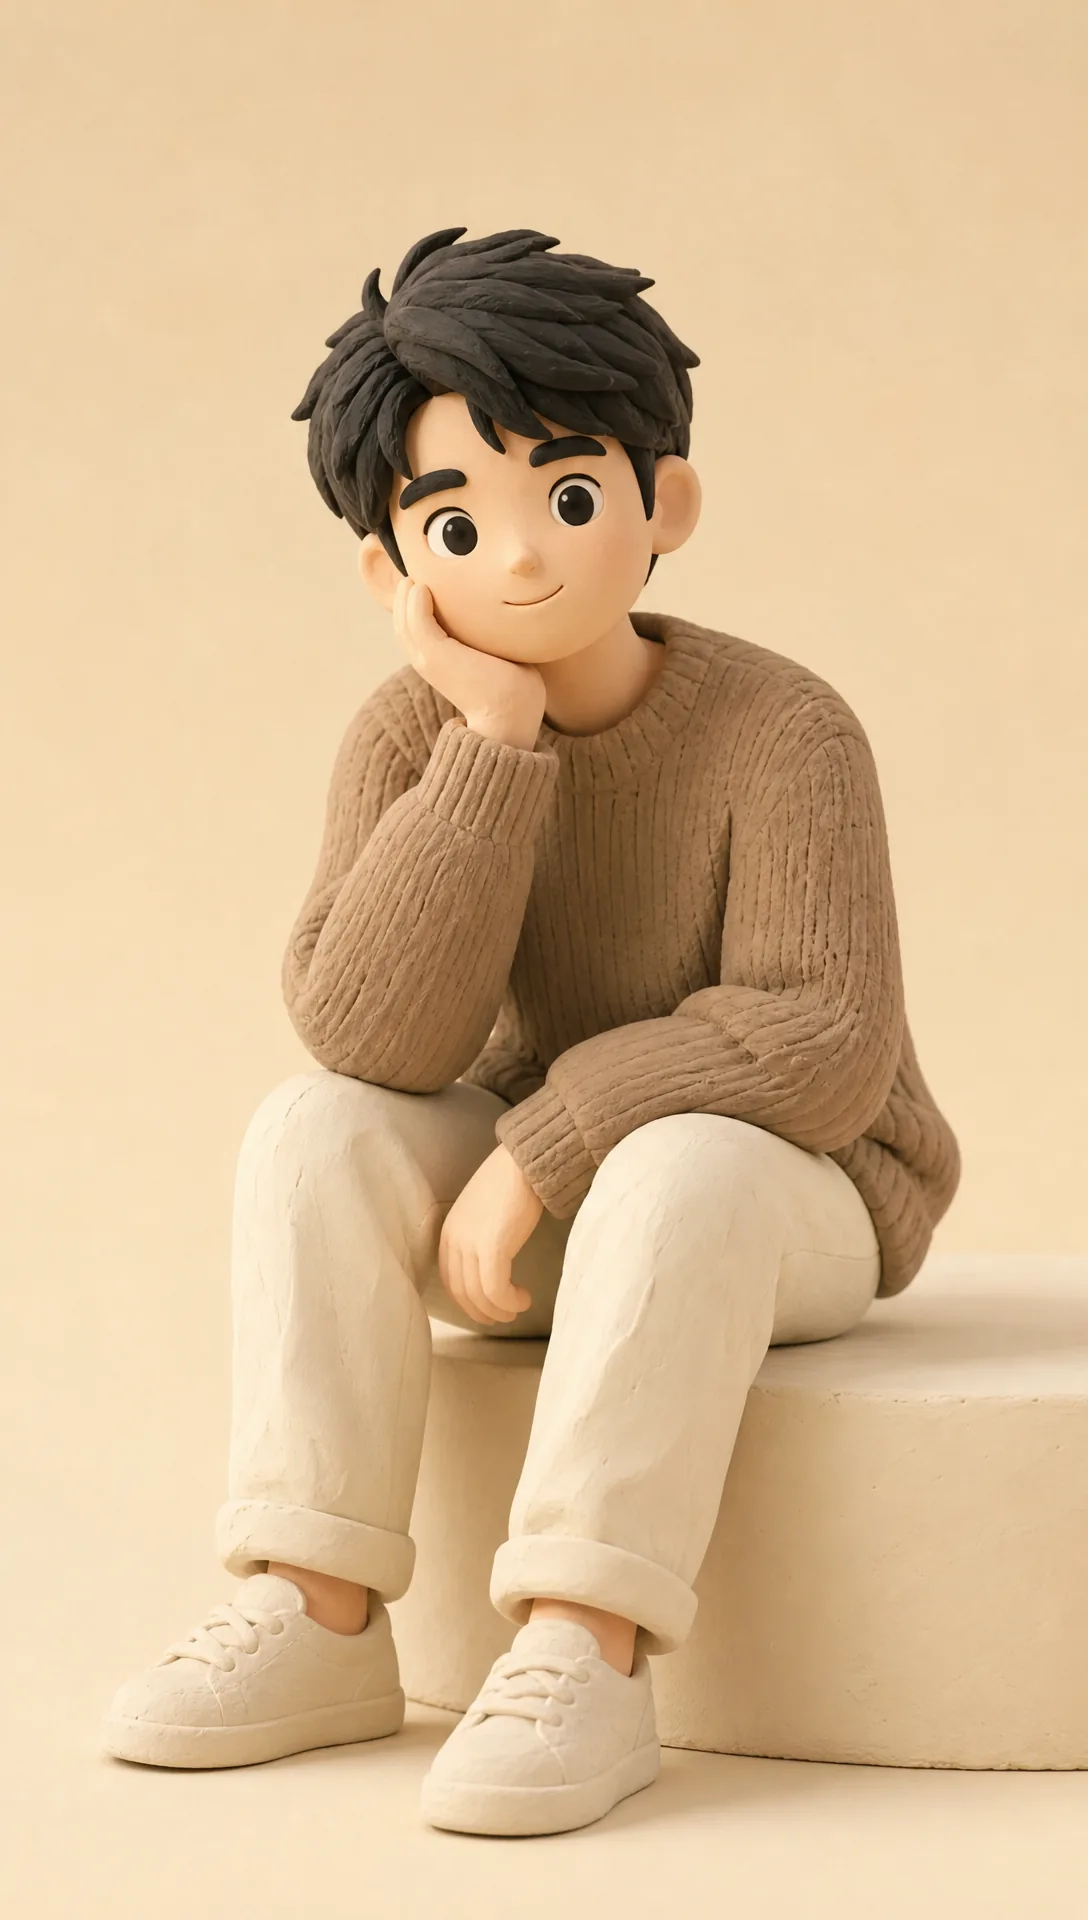
Fig. 1-12 Four figure styles: one character design, swap the style section for four different outputs
This is where the four-part formula shines: keep the character section (young man, short black hair) untouched, replace only the style section, and you can switch among chibi, sketch, retro, and clay at will. The next guide takes this formula into the two most stylized genres—illustration and comics.
FAQFrequently Asked Questions
The questions beginners ask most about this guide
What goes wrong most often when AI generates architecture photography?
Cluttered surroundings and distorted structure. The fix is to spell out the environment—”beacon towers scattered in the distance”, “a sea of clouds wrapping the mountain slopes”—and lock in structural clarity with “ultra-high definition, light and shadow tracing the building’s outline”; the image will hold steady.
What aspect ratio and viewpoint should I use for landmark buildings?
16:9 + a high-altitude top-down view. Landmarks are all about mass and extension; a landscape frame plus an aerial drone perspective (the case uses the DJI Inspire 3 + Hasselblad lens description) delivers the most majestic feel. Copy the f/8, 1/200s, ISO 100 parameters as-is.
Can AI generate a usable ID photo directly?
Yes. Grab four things in the prompt: a solid standard background (such as pure red), facing the camera straight at eye level, a natural neutral expression, and even soft lighting with no obvious shadows—plus a 9:16 vertical composition. The result matches standard ID photo composition, with no trip to the photo studio.
Is the visual creation prompt formula the same as photography simulation?
No—it is shorter. Visual creation uses four sections: core subject + style + scene + texture, dropping the equipment parameters from the five-part photography formula—creative images do not need a “camera feel”; what matters is nailing the style precisely.
How do I get AI to understand the style I want precisely?
Replace vague descriptions with concrete style keywords. For example, use “1980s Hong Kong film-style portrait” instead of “retro figure”, locking in the visual type and sub-style at the very start so the AI quickly settles on the creative tone.
Can I mix and match styles for figures?
Yes. Try cross-style element fusion such as “classic Hanfu + fashion-magazine composition”, or extract the core features of an existing work and reverse-engineer a prompt, achieving flexible style transfer and fresh expression.
About the Author: Julia, Veteran AI Image Creator
Julia has long used AI image tools for photography-grade portraits, stylized illustration, and artistic recreations, and has coached large numbers of complete beginners. Every case, prompt, parameter, and screenshot in this article comes from real generation records on the Puyo AI platform—not theoretical speculation, not stitched-together stock. Photography simulation wraps up with this guide, and the curtain on visual creation is just rising—the next guide enters the two stylized genres of illustration and comics.
The content is adapted and polished from the original material “From Novice to AI Art Pro | Complete Hands-On Tutorial Collection”, with all original prompts and figures preserved. Source: https://www.puyoai.com.
Swap In Another Mountain and Shoot Your Own “Great Wall”
Open the Puyo AI website, apply the aerial formula to a landmark in your city, and get a publicity-grade hero shot in ten minutes.
Results are affected by model version and randomness—the same prompt will vary slightly each time it runs; run it a couple of rounds before drawing conclusions.